Logging in - Outlook
Your Outlook app may look different depending on what device it's on and which version is being used.
In your Outlook app, find the option to 'Add New Account'. It's usually a plus sign on the left but can also be in your email settings.

Type in your email address and click 'Continue'.

It's likely that Outlook will choose the wrong type of account. Click on the option in the top right corner, in our example Outlook assumed the email is an Exchange one so our option is to click 'Not Exchange?'.

From the options that appear, click 'IMAP'.

On the next screen click 'Sign in'.

We need to add the custom IMAP settings so click 'Show Advanced Settings'.

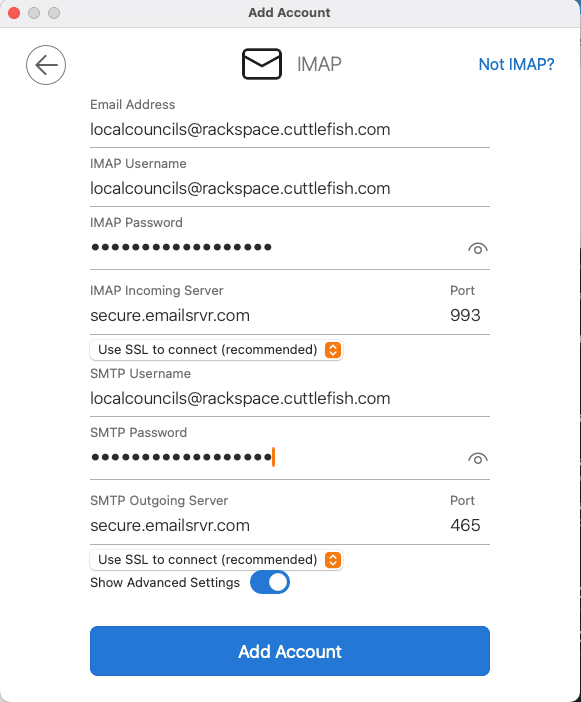
You can now input all of the necessary IMAP settings to add your Rackspace email to Outlook. Make sure that each field is filled in correctly otherwise, it won't work.
- Email address: your email address
- IMAP Username: your email address
- IMAP Password: your email address password
- IMAP Incoming Server: secure.emailsrvr.com
- Select SSL from the dropdown option
- Port: 993
- SMTP Username: your email address
- SMTP Password: your email address password
- SMTP Outgoing Server: secure.emailsrvr.com
- Port: 465
- Select SSL from the dropdown option
Click 'Add Account'. Your Rackspace email has now been added to Outlook.


